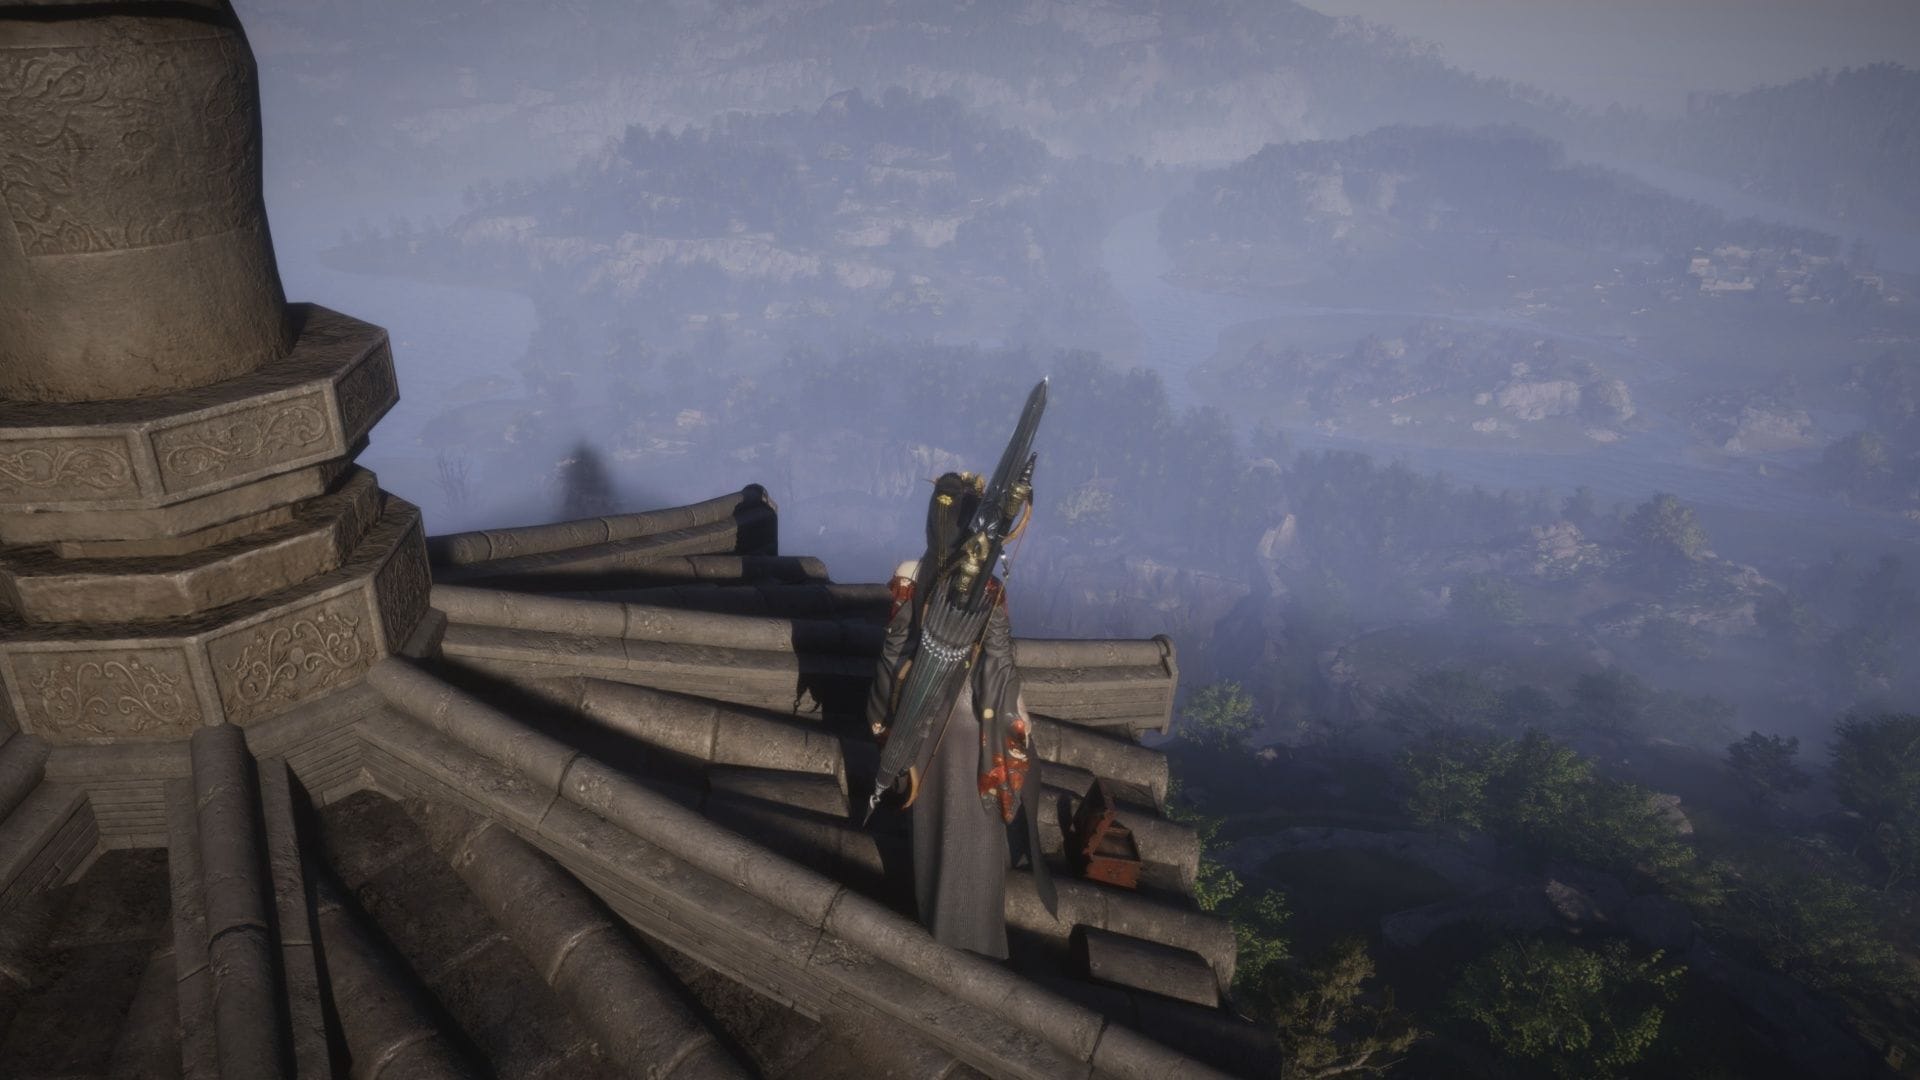
The Promised Light is the culmination of your Where Winds Meet experiences in the Qinghe region. You cannot complete it until you’ve met some pretty specific requirements, but it’s one worth doing. All of the side quest chapters in the Qinghe region were interesting, but this one will not only wrap up the region for you, but also unlock one of the more challenging boss fights you can tackle in the Campaign mode. We recommend also doing the other side quest chapters first, to unlock a variety of useful powers, but more importantly, Exploration Points, which are one of the hard requirements for unlocking The Promised Light in Where Winds Meet. Complete The Promised Light walkthrough in Where Winds Meet In order to even begin The Promised Light in Where Winds Meet you need to speak to the Wayfarer in Sundara Land, as well as reach 6, 000 Exploration Points in the Qinghe region. Without these you cannot even begin the quest, much less see its name. Looking for Crossword hints & solutions? Check out latest NYT Mini Crossword Answers, LA Times Crossword Answers, and Atlantic Crossword Answers In addition, you’re also going to need to complete both the Palace of Annals and Bodhi Sea campaign quests, because they will give you the two halves of the Light Jade you’ll need to solve one of the puzzles. Once you’ve met these requirements, you can track the quest in your Journal. Steps to complete The Promised Light Place the Buddha’s Light Jade atop the Buddha’s Light Pagoda, Seek the Secrets of Buddha’s Light Pagoda, Explore the Space Beneath the Pagoda. Decipher the Bronze Mirror Contraption, Delve Deeper into the Cavern, Find the path back to the upper levels. Traverse the Mural Corridor, Proceed swiftly, Escape the collapsing platform, Descend into the depths of the cavern, Venture into the Deepest Reaches of the Buddha Grotto. Defeat Tian Ying 1) Place the Buddha’s Light Jade atop the Buddha’s Light Pagoda, Explore the Space Beneath the Pagoda When you’re ready to begin The Promised Light in Where Winds Meet, go to the Buddha’s Light Pagoda, and either by climbing, or with flight, make your way to the top and place the Buddha’s Light Jade atop the Buddha’s Light Pagoda. This will open the door, and let you actually enter the Buddha’s Light Pagoda that has, until now, been locked. Drop down and go inside, and there will be a lever you can pull in the first room, that will open a passageway for you to proceed. Grab the treasures and various collectibles in the next room, and then take a look at the Buddha statue in the room. Equip Meridian Touch, and you can start solving the puzzle. Activate Wind Sense and look at the statue. You should see the ability to turn it Clockwise or Counter Clockwise. Rotate the light so it points right at the door, and it will open so you can proceed. This was the easy part of the puzzles, though. The next room in Where Winds Meet’s The Promised Light has a much bigger light puzzle. 2) Decipher the Bronze Mirror Contraption, Delve Deeper into the Cavern, Find the path back to the upper levels Unfortunately, my footage from the Early Access period was corrupted and I lost the steps to complete this puzzle. GuidingLight’s video, embedded below, will be there until we can recreate our footage on the main servers, where we’ll update accordingly. Once you’ve rotated the mirrors so the light hits the proper location for this part of Where Winds Meet’s The Promising Light quest, you can proceed through the open pathway ahead. When you enter the next room, the ground will crumble under you, and you’ll drop deeper into the cavern. Investigate the man sitting in front of the pillar, and you’ll receive a letter, and trigger a fight. You cannot deal damage to the mechanical puppets that spawn. You have to defeat these enemies by parrying them, so just keep parrying until you’ve bested them. Hopefully, you’ve been practicing, but if you’re on Story Difficulty, it won’t be that taxing. Defeat them, and head back up the path, and after you push the door open, you’ll find a fork in the road. Go right first, to grab a treasure chest, then take the left fork to proceed to the next part of this Where Winds Meet’s side quest. That path will have three more mechanical puppets that must be parried, so patiently parry them and wait for them to crumble. 3) Traverse the Mural Corridor, Proceed swiftly, Escape the collapsing platform, Descend into the depths of the cavern, Venture into the Deepest Reaches of the Buddha Grotto. Push the door open and proceed for the final length of The Promised Light in Where Winds Meet. You’ll find a side path along the Mural Corridor, where you can complete a little jumping puzzle to secure a treasure chest. In this hallway, you’ll see a buddhist mantra painted along the wall that you can investigate, so make sure to do that. When you run to the end of this corridor, you’ll also trigger a cutscene. After that ends, take the path down to the right, jumping on and over the statue’s hand, and go down the first alternate path to get another treasure chest. Then return to the main path. You’ll have to walk along plank paths and ropes, heading deeper down into this Where Winds Meet dungeon. On the second rope, you can look down to see a treasure chest. Drop down for it if you’d like, then keep following that rope back up. It will lead you to another plank to walk to. Everything’s fine until you reach the point where the ground starts crumbling. Move fast, and use the special movement buttons that pop up in time, so you don’t fall to your doom. Now, you need to descend to the depths of the cavern. On the ground you’ll see one final light puzzle. Click on the Boundary Stone first, though. Rotate the mirror Counter Clockwise until it hits the door ahead, and pass through. From here you venture into the Deepest Reaches of the Buddha Grotto, and get ready for a boss fight. 4) Defeat Tian Ying Make sure you interact with the Hero’s Tomb before beginning this fight. Tian Ying’s is likely going to be the hardest boss you’ve faced so far in Where Winds Meet so far. Leave Meridian Touch equipped so you can nullify his shockwave attack. If it’s still on cooldown when he does it again, just get out of the way as soon as his staff starts glowing, to avoid taking an incredible amount of damage. Phase 2, he’ll use a Buddha statue to attack you, which inflicts a number of painful AOE strikes. Keep to the side of the battle arena, as this is the boss’s blind spot in this phase. If you’re using the Vernal Umbrella, you have an advantage (or any other ranged weapon), because you can constantly hit him while being relatively safe from harm. Then in Phase 3, he summons clones to help him fight. Ignore those when Tian Ying is on screen and parry him instead. Parrying will nullify the clones, making this phase much easier. When you’ve finished this, escape the cave, and you will have officially wrapped up the side quests for Qinghe. You will receive: Zhou Coin x17, 000 Character EXP x17, 000 Enlightenment Points x100 Qinghe Exploration x80 Echo Jade x84 Level 1 Ebon Iron x4 Medicinal Tales x1 Yaksha Rush Check out our other Where Winds Meet guides and features 5 strongest Martial Arts to use in Where Winds Meet Best Where Winds Meet character customization codes How to fly in Where Winds Meet: All Lightness Skills unlock guide Best beginner’s tips and tricks for Where Winds Meet Are you stuck on today’s Wordle? Our Wordle Solver will help you find the answer.
https://www.sportskeeda.com/esports/where-winds-meet-walkthrough-how-complete-the-promised-light